Get real client ip when server is behind proxies
Server Architecture V1
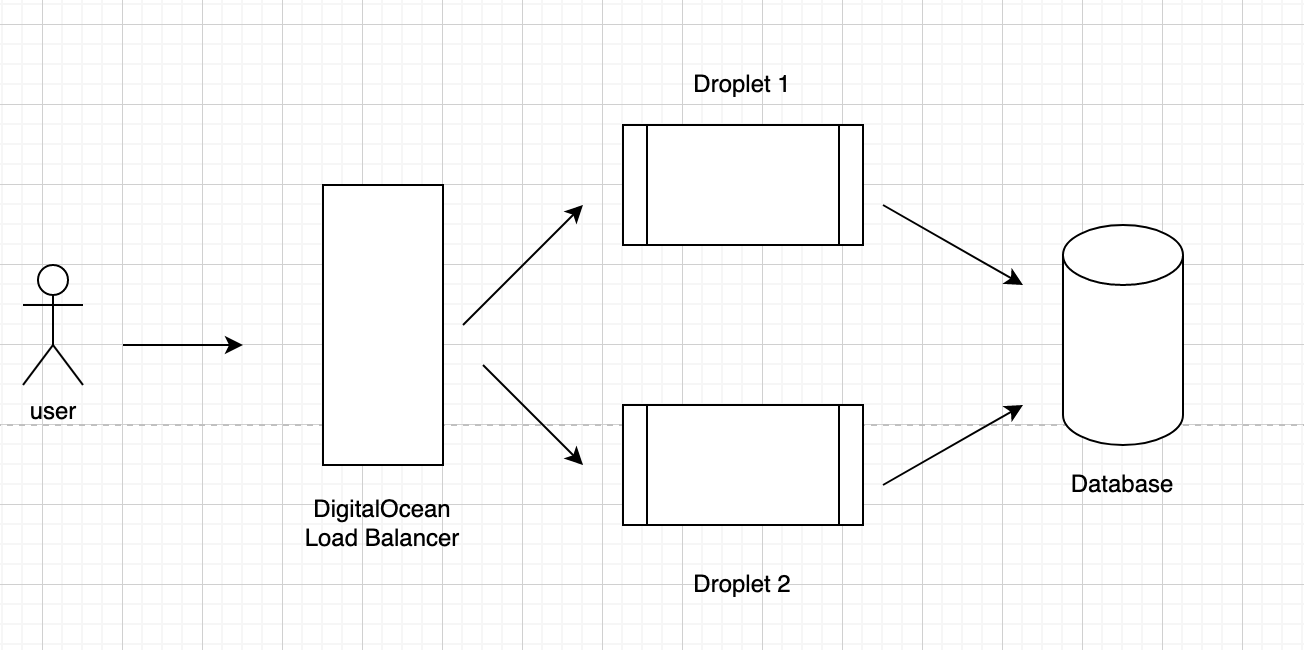
I was starting to use the DO’s load balancer, my server architecture is like this:
I have Nginx running on my Droplets, and to get the real IP, we first need to config the DO’s load balancer:
- go to Networking > Load Balancers, select your balancer
- Under settings tab, click “Proxy Protocol” and enable it.
Now in the Nginx on the droplet, first we need to enable the proxy protocol:
1 | server { |
Now the website should work now behind the load balancer. But now in the server access log, the client IP is logged as the load balancer’s IP, which is not what I want. I want to get the real client IP so I can do further geo location based feature.
To get the real ip, first need to check if the Nginx has real_ip module installed.
1 | nginx -V 2>&1 | grep -- 'http_realip_module' |
I was using apt install nginx to install the default nginx, and the http_realip_module is installed by default. I don’t have the second one, but I don’t need it at this moment.
Now back to our website’s nginx config file:
1 | set_real_ip_from 10.108.0.0/20; |
Here we use set_real_ip_from to define an IP range to indicate when a request is from this IP (my load balancer in this case), extra the real_ip_header field from the “X-Forwarded-For” field in the header. And also set the X-Fowarded-For header in order to forward this request to our real application handler (like Django or Starlette in my case). We also define a log_format which included the proxy_protocol and remote_addr. In our above architecture v1 case, these 2 IPs will be the same.
… the $remote_addr and $remote_port variables retain the real IP address and port of the client, while the $realip_remote_addr and $realip_remote_port variables retain the IP address and port of the load balancer [1]
Once we define the log_format, we can use it for our access log. Also, if you want to limit some IP access, because we already extract the real ip from the header, you can add the allow/deny rules like normal in Nginx:
1 | allow 203.0.113.10; |
Also, to secure the Droplet, we’d better set some firewall rules in the Droplet server such like only allow port 80 connections from the Load Balancer. We can set this Firewall rule in DO’s “Networking” > “Firewalls” Page.
Server Architecture V2
Later I want to use CloudFlare to put in front of my DO’s load balancer, yep, a proxy in front of another proxy, to prevent DDoS. CloudFlare has a good name on this.
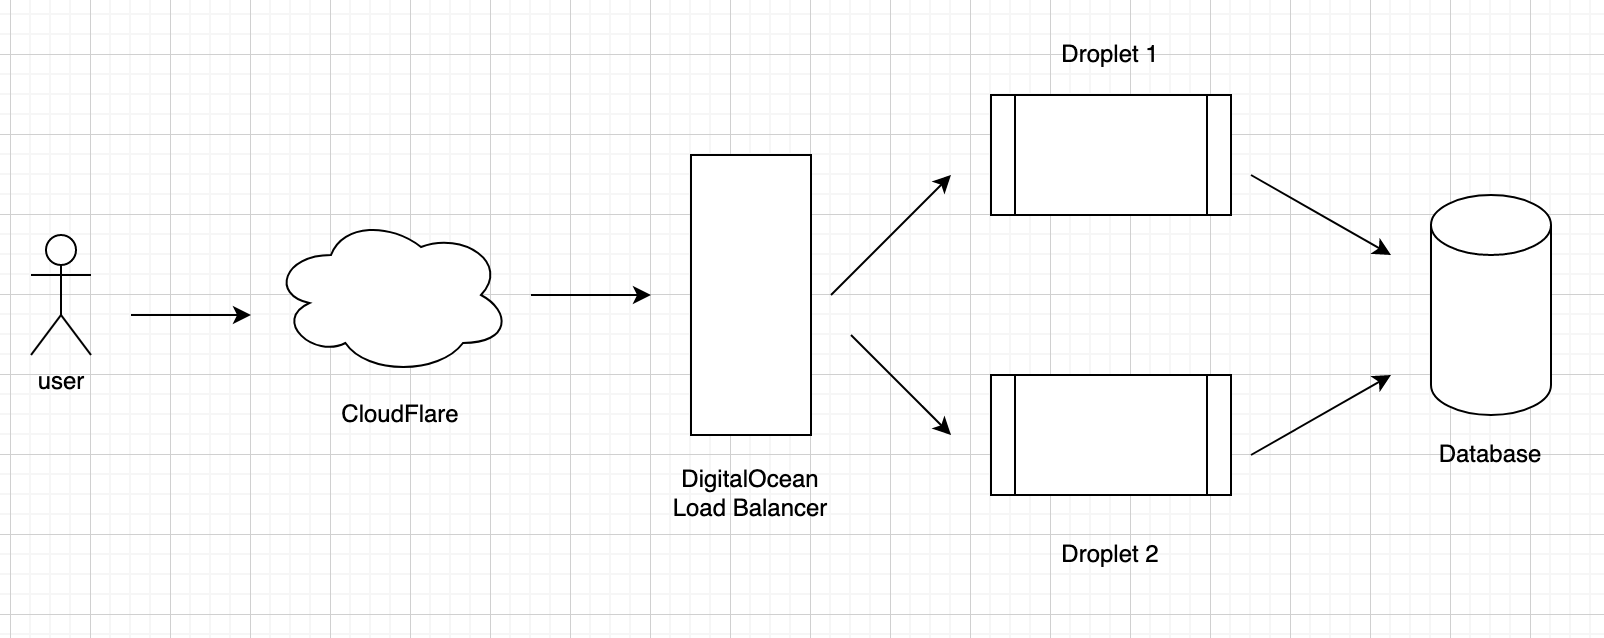
So first I need to transfer my domain’s DNS to CloudFlare, and the server architecture like this:

Now we need to change our Nginx settings to get the client’s real IP b/c there are 2 layer of proxies. According to the doc:
CF-Connecting-IP
Provides the client (visitor) IP address (connecting to Cloudflare) to the origin web server. 3
So we can get the client ip from the CF-Connecting-IP header field. Let’s change our configs in Nginx:
1 | set_real_ip_from 10.108.0.0/20; |
Now we grab the real_ip from the CF-Connecting-IP header, and set that IP to X-Real-IP header for our real app handlers. Please notice now that the $proxy_protocol_addr and remote_addr are different now. The former one is CloudFlare’s proxy server IP and the latter one is the client’s real IP. You can see that in the access log:
1 | 108.163.218.1 - 203.0.113.10 - - [04/Sep/2020:19:11:11 +0000] "GET / HTTP/1.1" 200 396 "-" "Mozilla/5.0 (Macintosh; Intel Mac OS X 10.15; rv:79.0) Gecko/20100101 Firefox/79.0" |
Two other things:
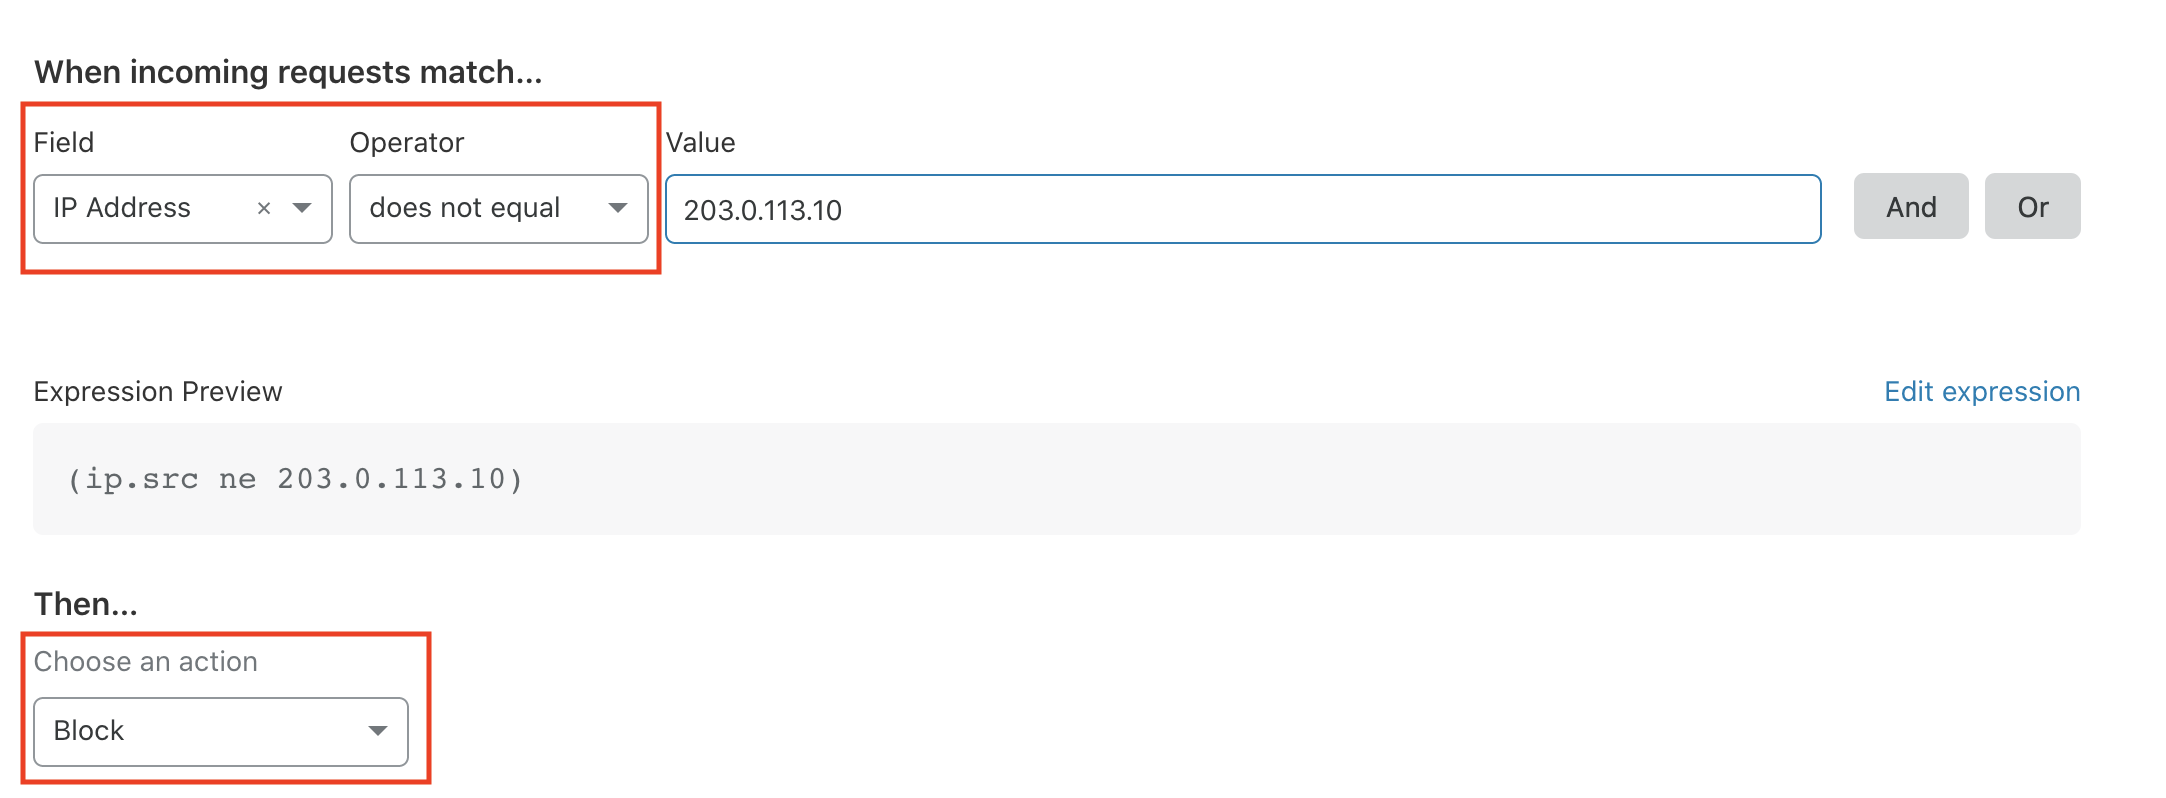
Now if we want to limit some IP access, we don’t have to add the IP in the Nginx config. We can directly set a Firewall rule in CloudFlare. Just go to the “Firewall Rules” tab to add a new Firewall rule, like this:

CloudFlare will auto generate a SSL for our domain. When user visit CloudFlare’s proxy server, the connection is encrypted, then CloudFlare will proxy that request to our load balancer, so this part connection should also be encrypted. We need to add the forwarding rule to DO’s load balancer:
- Generate SSL cert in CloudFlare: go to SSL/TLS table, click “Origin Server”, click “create certificate”
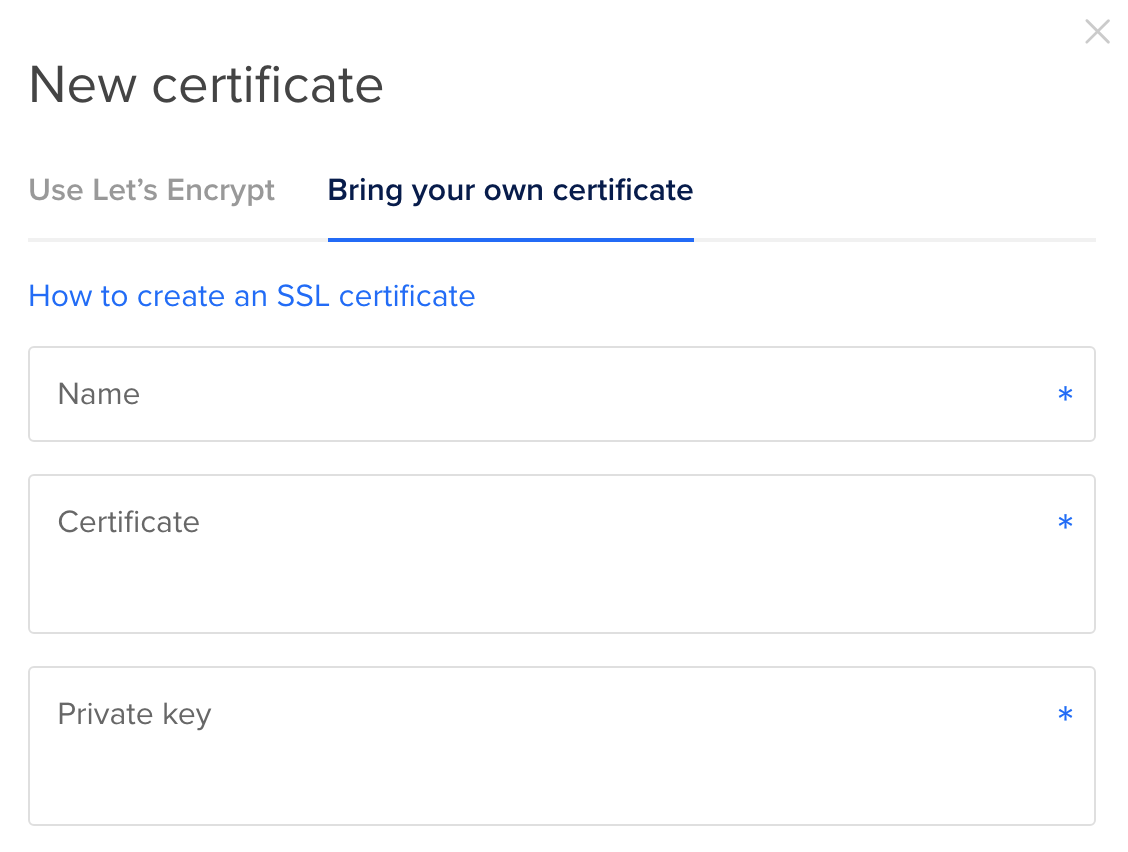
- Grab the certificate data, copy and paste them to DO’s load balancer settings: In DO’s load balancer settings, click the “forwarding rules”, add forwarding HTTPS:443 to HTTP:80 (our droplet), and one of the field will require you add SSL certificate, click “+ New Certificate” > “Bring your own cerficate”, in there paste your SSL cert generated from the previous step.

Now the architecture looks good: CloudFlare will prevent DDoS, and forward secure data to DO’s load balancer, then the load balancer will forward data to backend droplets, and our droplets only allow connections from the load balancer, so it cannot be acessed from other public IP, which make it very secure, plus via the Nginx settings, we are still able to grab Client’s real IP behind 2 layers proxies. Hooray!